There is no doubt that property crimes are on the rise. It seems we always hear of home break-ins, auto theft from homes, and even packages being stolen right off peoples porches – in broad daylight light! Here we will share with you an overview of the importance of installing home security camera systems, and walk through basic steps to take in installing one.
Why install home security camera systems?
Among the many reasons to install home security camera systems, the most obvious reason is to deter break-ins and malicious activities. According to FBI.org, nationwide in the United States, an estimated 7.9 million property crimes took place in 2016. These losses incurred an estimated $15.6B in losses! The information also provided that there were about 420 arrests made per 100,000 inhabitants. Other sources suggest that 3 out of 4 households will be broken in to at some point in the next 20 years. With these numbers, it is highly likely that everyone reading this article, including the author, has or at least knows someone who has been a victim of a break-in.
Most people park their vehicles outside, which are normally prime targets. According to the Insurance Information Institute, in the United States in 2016, there were over 765,000 vehicles stolen, which was an increase of about 7.4% from previous years. This is not to say they were all stolen at homes, but anytime a vehicle is parked with little to no public activity going on, there is a potential risk.
Another reason would be to watch over your loved ones. Perhaps you have a parent or grandparent that is at a point between being completely independent and beginning to need a little assistance, but not at the point of transitioning their living arrangements.
Planning your home security camera system
Planning is everything, especially if you want the job done and complete the first time. So consider what it is you are trying to protect – doors, vehicles, perhaps a shed or detached garage, pets even. You want to keep in mind the cameras have to attach to something, and if outdoors, the best place would be under the eave of the roof. This also offers a more convenient way to get cabling to the camera as from the attic, unless you go the route of a wireless system.
You want to view both the front and back doors, and any other entrances you may have into your home including a garage. In this planning stage it’s a great time to review your home security.
Choosing your security cameras
Home security cameras come in a few different types. These types range from wired or wireless, indoor or outdoor, bullet or dome… It seems like a lot to consider, right? Not really. Now that you know the locations of your cameras, you should have the first decisions made – indoor or outdoor?
Next, you will want to consider wired or wireless. Will you be installing the cabling yourself? Will you be hiring the job out? If cabling is in your scope, then wired cameras will be the way to go. If you are doing the job yourself, then you can save a decent amount of money over the cost of a wireless system at the cost of the potential labor-intensive cabling.
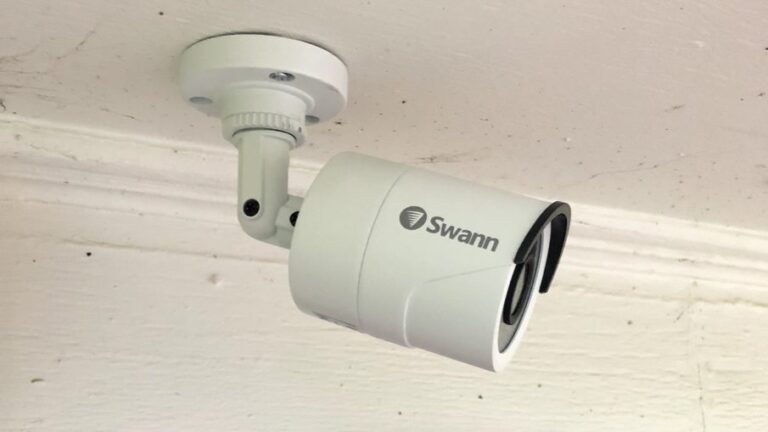
The next thing to consider would be bullet or dome cameras. Dome cameras are more low profile and less of an eyesore and are more suited for indoor use. They require more attention when installing and making adjustments. My experience with dome cameras is the need to clean the dome from time to time, to prevent the “smoky” view on the playback. Bullet cameras are a bit more conspicuous but are easier to install and adjust. They normally have a longer range and are more commonly used for outdoors.
There is a new breed of “smart cameras” available. They can be integrated with a home’s smart system if available, and some even offer AI technology for zoom and playback functions. These cameras will cost quite a bit more. For instance, you can purchase a kit of 4 bullet cameras, a DVR, and cabling for as low as $300.00, whereas a kit with 2 cameras and included parts will run about $450.00, and can only be used indoors.
How to install security cameras
OK, now you have planned the layout and decided on the types of cameras you need, it’s time to install them. For this, the steps will be shown to install bullet cameras, all of which are outdoors. Unless you are installing a single AI or smart camera, these same steps can be taken. Please keep in mind that these steps are very basic by design. This section assumes you have prior knowledge of certain cabling techniques. This basically only lists the order in which to install your system.
- Decide where you want to connect the DVR.
a. Consider things like, is there a TV to connect the DVR to?
b. Can I connect the DVR to the internet router (if not wireless)?
c. Will I be able to get the camera cables to the DVR from the attic, basement, etc., if not wireless cameras? - Pull the cables.
a. Make sure the right ends go to the right place! The power cable on the camera will only connect to one side. b. When pulling the cables, make sure the correct end is at the camera. This will save you a lot of time and frustration!
c. Carefully choose the cable routes. This particular home is a one-story home, with accessible attic space the entire way.
d. Run the cables from each camera location to the DVR.
e. Install the low voltage cut-in ring and wall plate. - Connect the cables on the outside to the cameras.
- Fasten the camera mounts to the eave (or whichever location you chose).
- Mount the camera and aim. The fine-tuning will happen after you connect and power up the DVR.
- Connect the cables and power up the DVR.
a. Connect the camera cables to the DVR, and the power cables to the power supply.
b. The DVR should come with a Quick Start guide or other instruction to walk you through the set-up process.
c. Once the set-up is done, proceed to step 7. - Once you can see the cameras on the screen, make the appropriate adjustments. Bullet cameras can be adjusted by aiming up or down, left to right, and most will allow you to rotate in the case of a tilted view on the screen.
- If your system is internet capable, go through the manufacturer instructions to set your system up on your smartphone.
Conclusion

Home camera systems are a good way to deter theft and vandalism. Installing your own system is admittedly a bit of a task, and is not recommended for DIY beginners. Don’t hesitate to ask for help as some steps require two people. ALWAYS remember ladder safety. If you have any questions or want to leave a comment, please do so below.
Jake is a tool guy – think Tim Allen from Home Improvement but with a much drier sense of humor. He lives in the great state of Ohio and plays the guitar on his downtime. He also spends his time writing on all things tools and DIY-related as this is his passion.